I got asked yesterday about the best way to mount a projector to an electric over a stage. This is not hard to do, but it gets a little murky when you try to research it online. The projector industry is aimed primarily at mounting projectors to a ceiling in a classroom or a conference room. Projectors mounted like that do not need to be adjusted much, and they do not get focused regularly like lighting instruments do.
An important thing to understand at the beginning of this conversation is that projectors do not shoot their light straight out. They are engineered to sit on a table and shoot straight across it and up the wall. Some of the field might go down a little bit, but in general, the field is almost entirely above the lens if it is sitting on a table or desk.
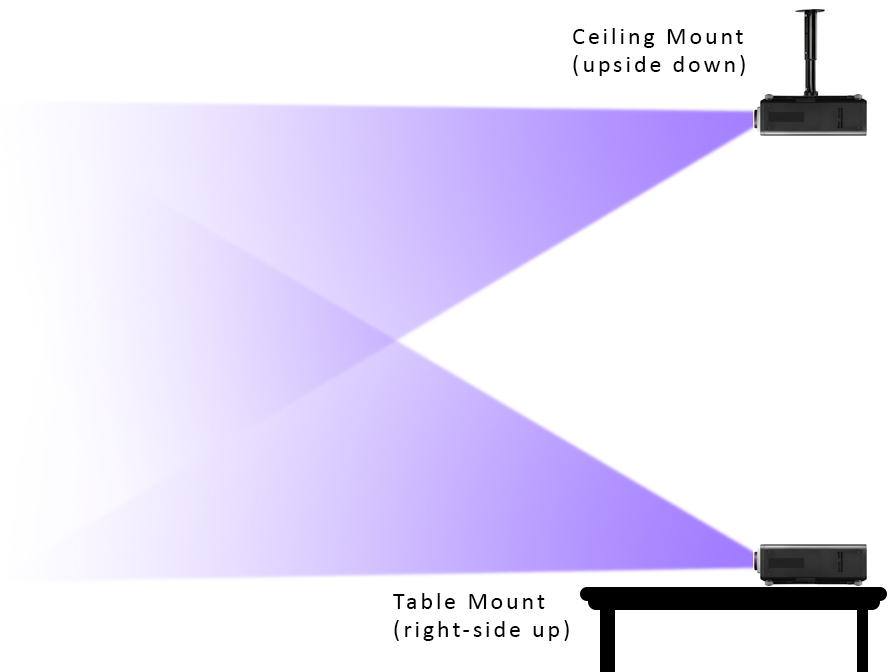
When you mount a projector to a ceiling in a classroom, the projector is mounted upside down, with the buttons downward. This makes the projector fill a screen on the wall even though the projector itself is hung level. For any given projector, you will need to cycle through the four different installation modes. These include ceiling vs. table, and front-projection vs. rear. If you do this a lot, you will get good at operating menus that are upside down and backwards. If you know that your projector is going to be tipped a little bit up or down, consider which of these modes is going to require the least amount of tipping.
The next thing to know is that projectors are designed to be mounted. They all have three or four little threaded bolt-holes on their undersides. The exact location and arrangement of these holes varies from projector to projector.
Once upon a time: The DIY Solution
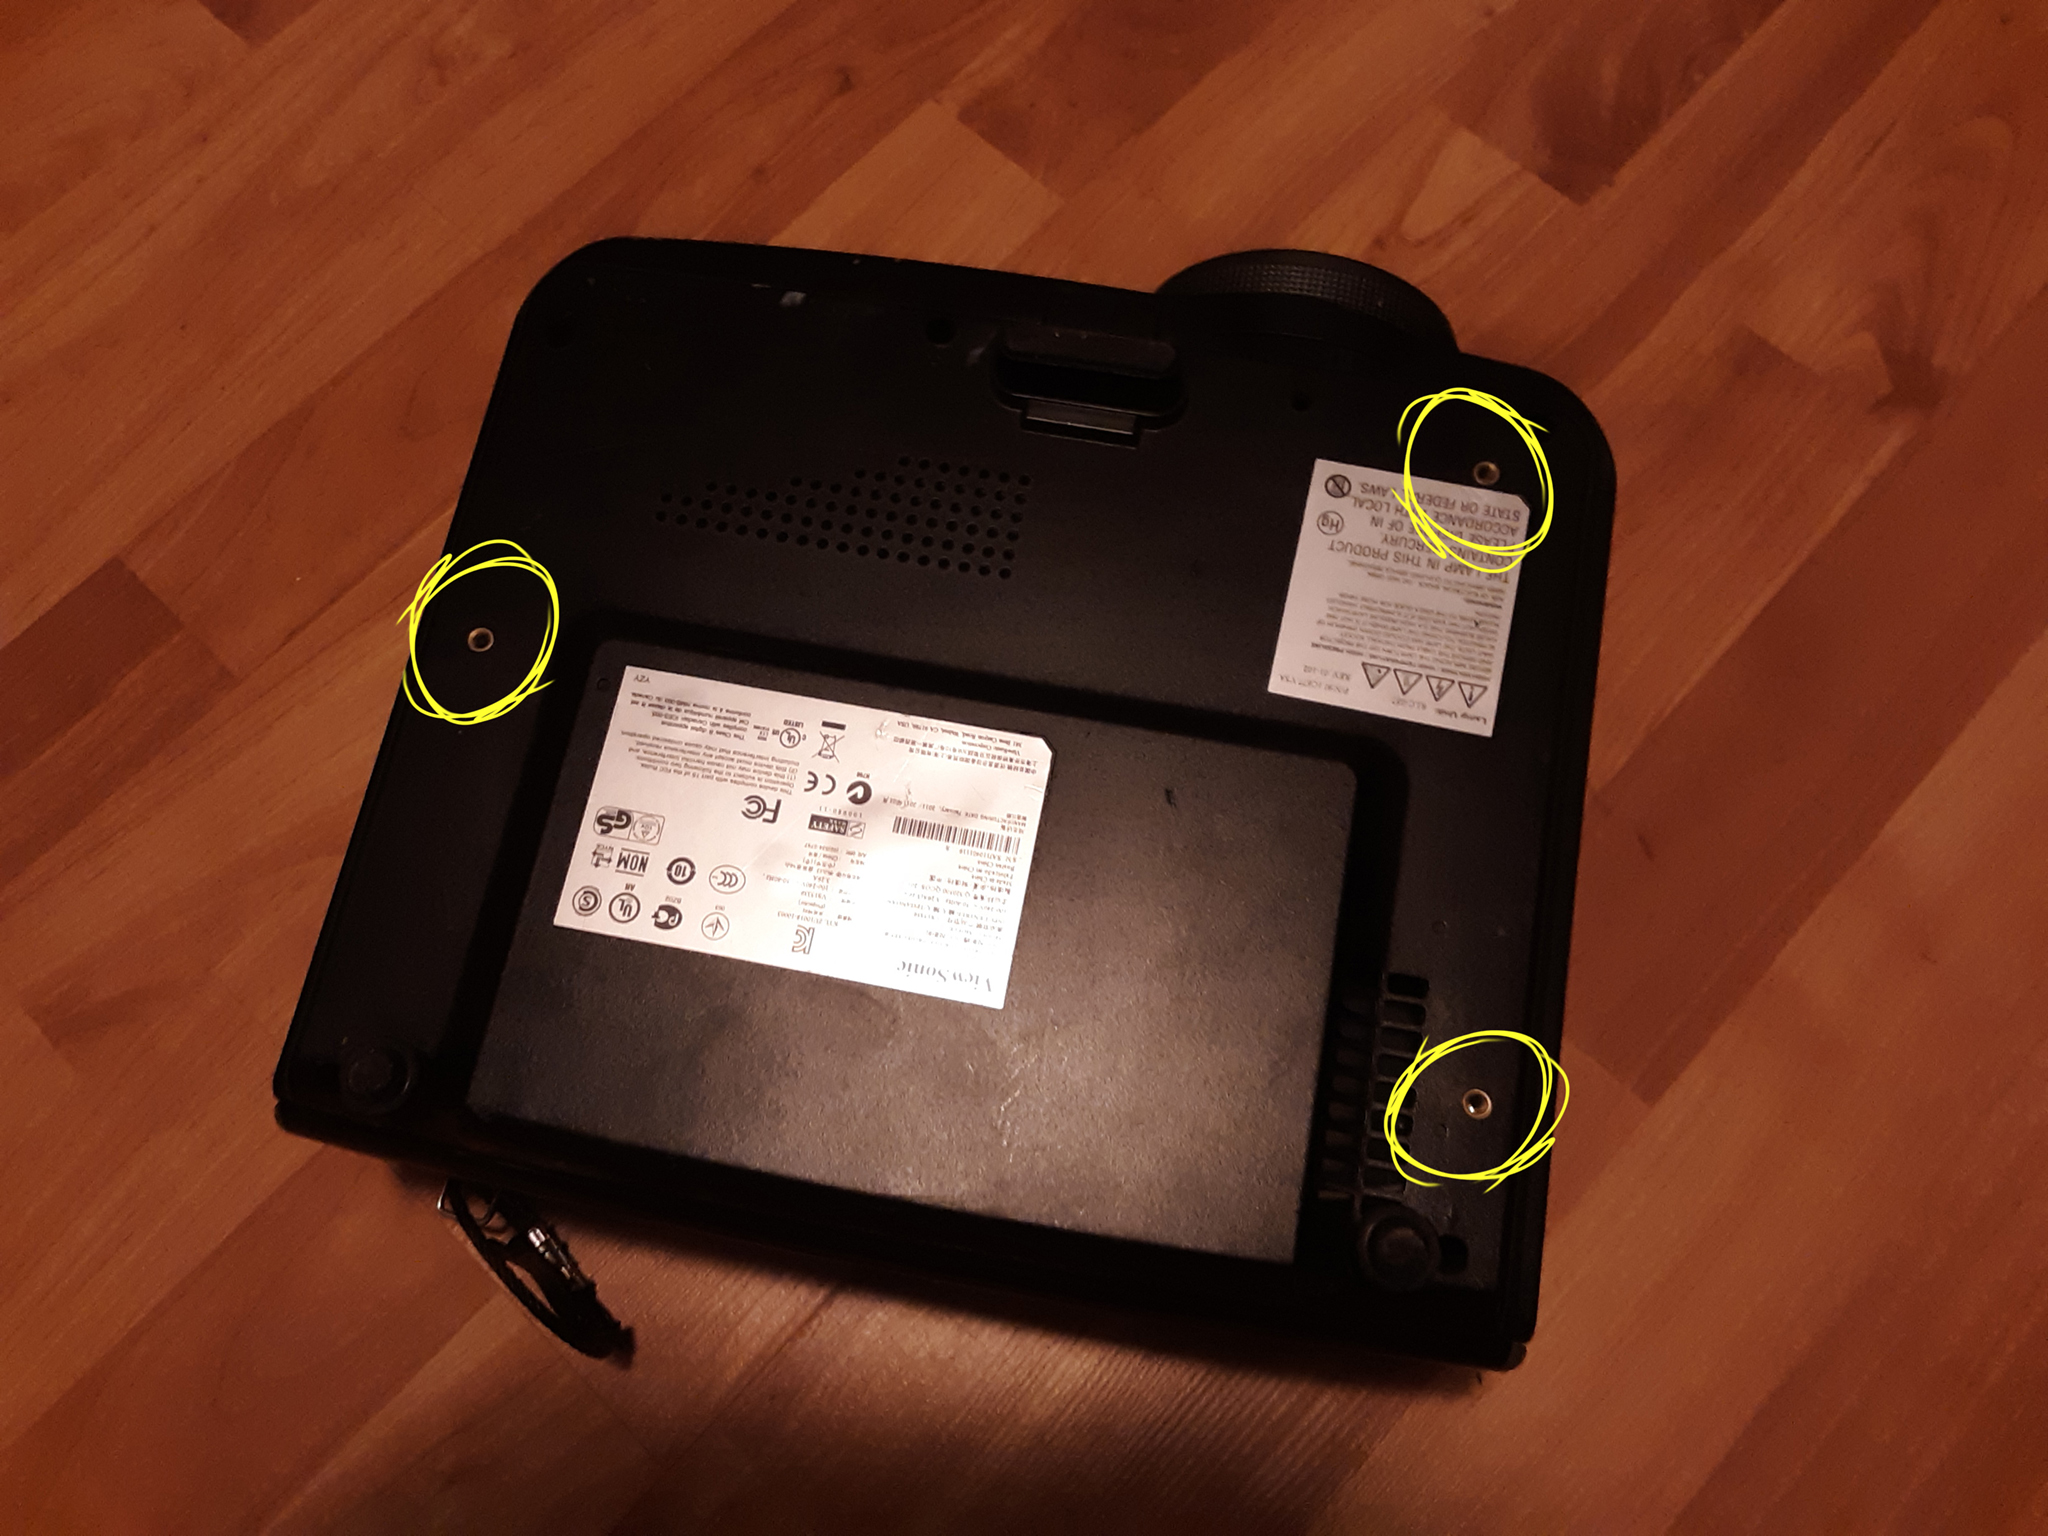
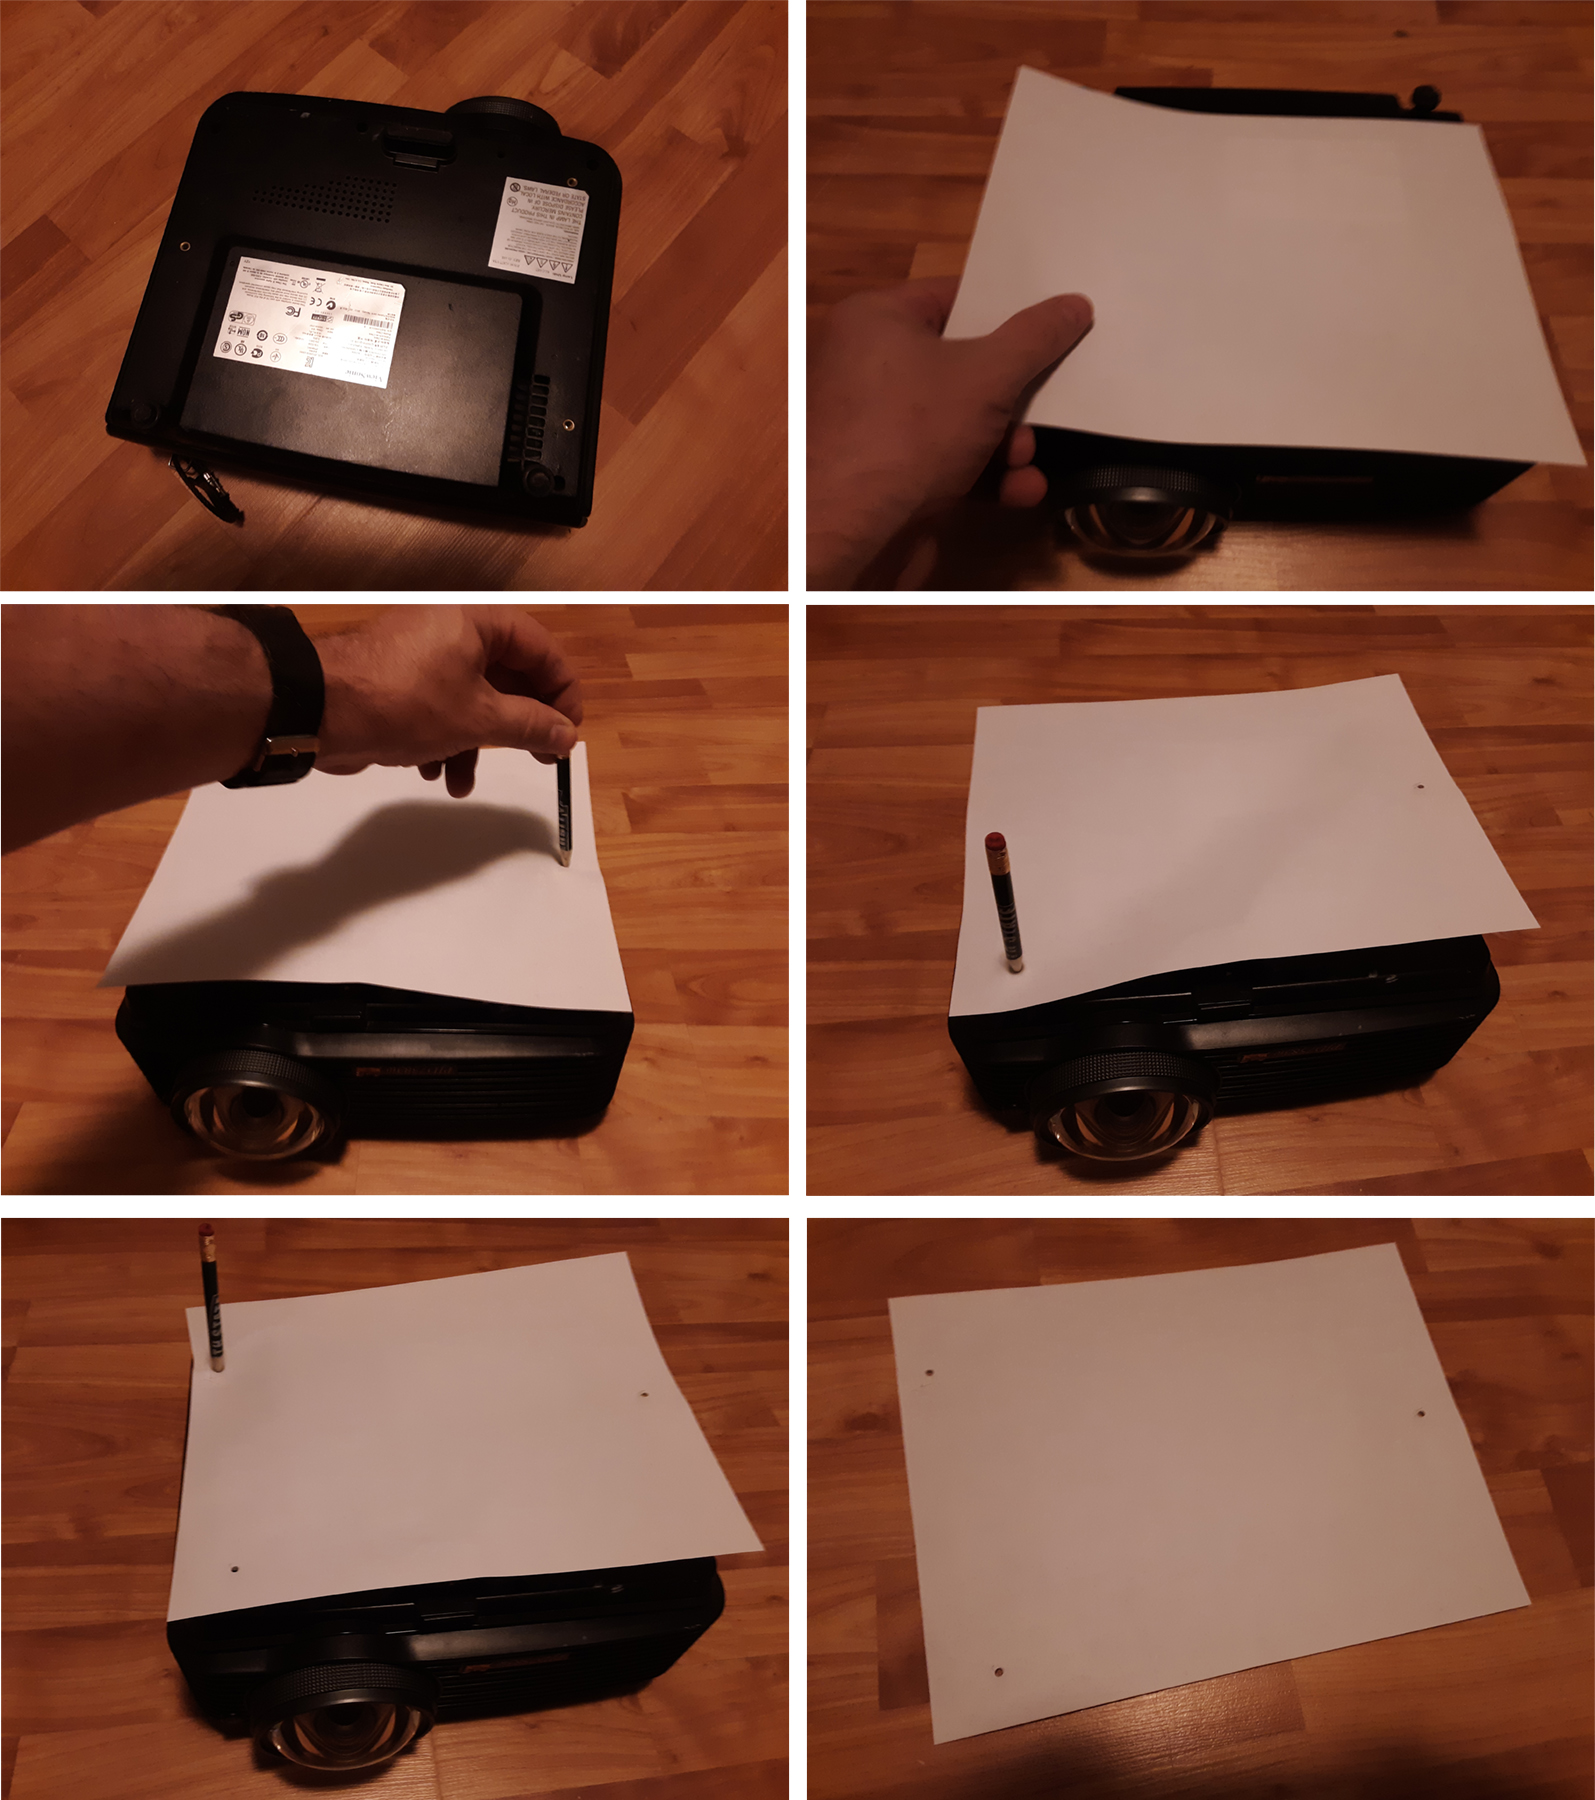
Back in the early 2000s, I used to make my own mounts for projectors. I would trace the pattern of the mounting holes using a piece of paper, and transfer that to 3/4″ plywood. I would build a wooden mount that I could attach to my projector, and ultimately attach a C-clamp to it.
It was important to build this solidly, with thick wood, heavy screws, and proper wood-glue. Rated hardware and normal precautions for overhead scenery applied for this as to anything else being flown in any way.
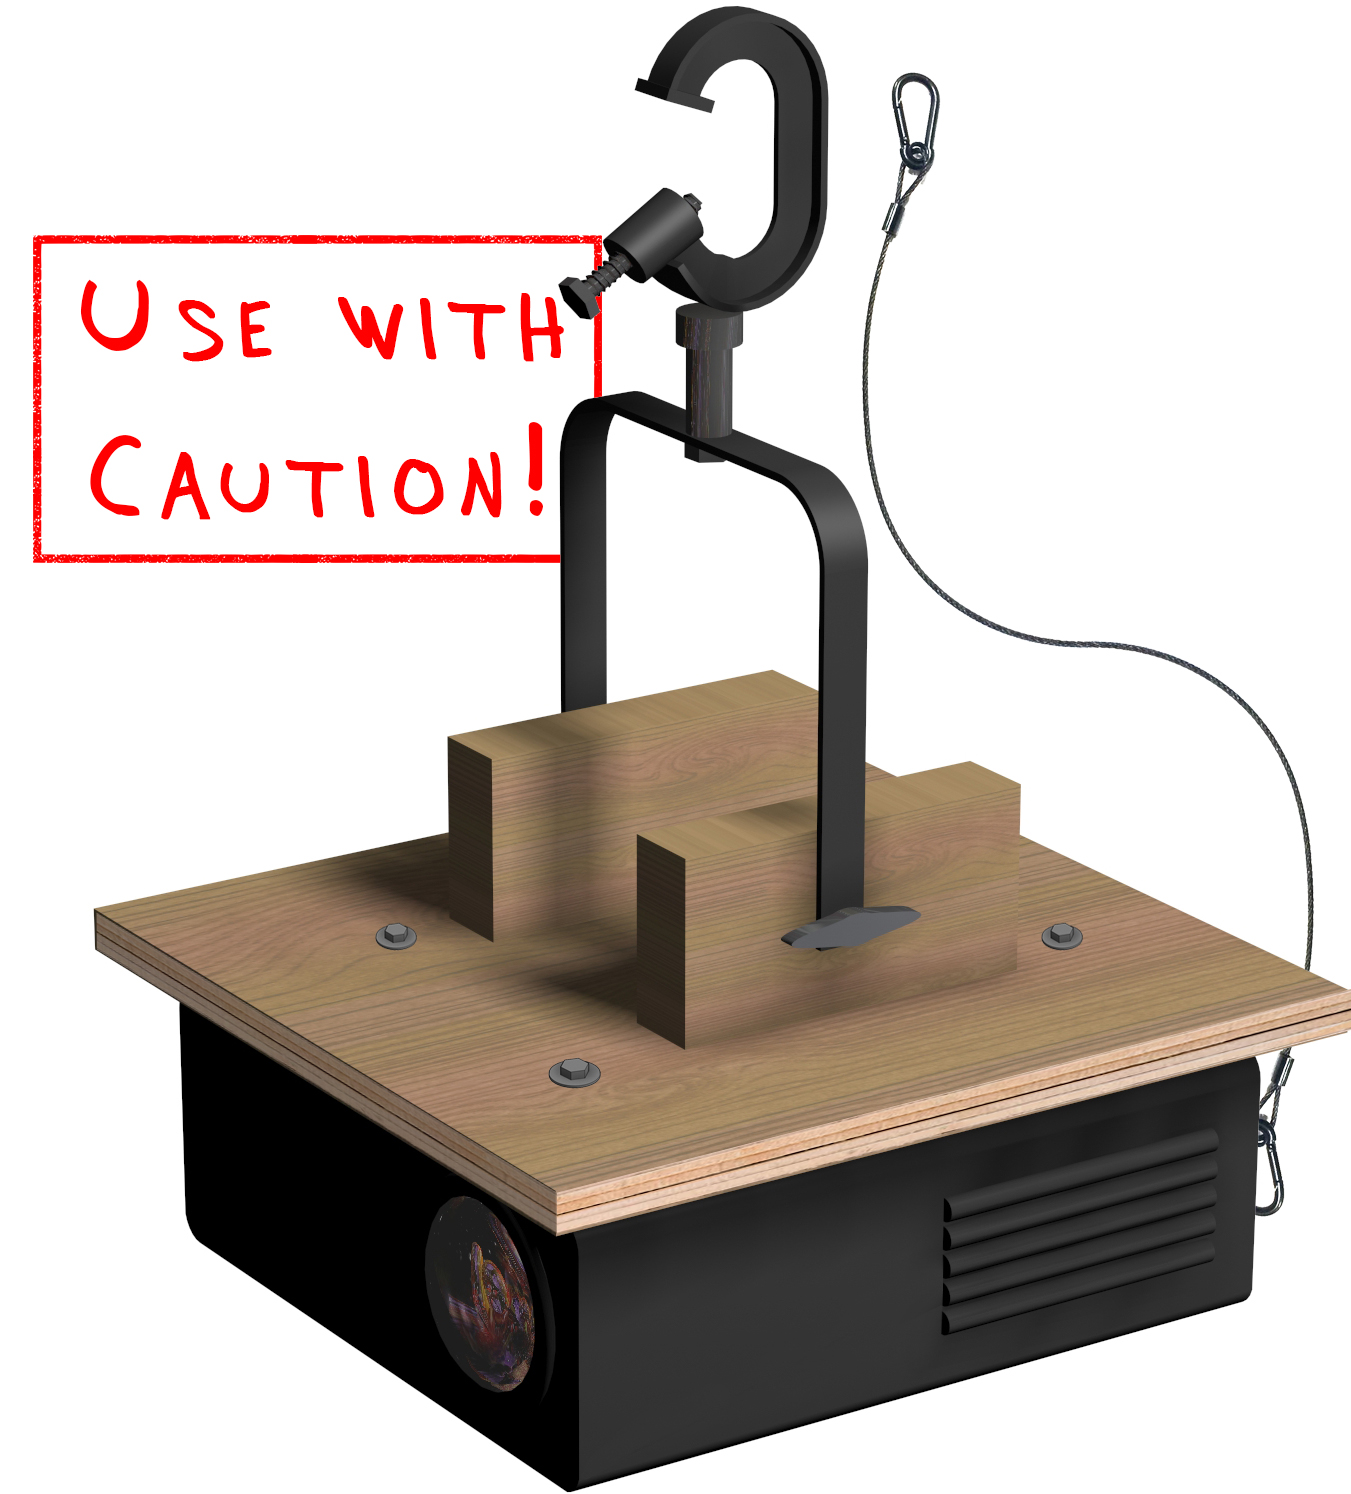
The combination of wood and electrical appliance might bother some technical directors , and there are other good options available now (continue reading). I recommend a factory-made, all-metal solution. This sort of rig was typically used in a lighting bay where it was not actually over anyone’s head. I might have hung it with a catwalk just below it, or on a low boom-arm. It was important to keep the sides of the unit exposed for ventilation. A complete wooden box can cause the projector to overheat.
Using a Truss Ceiling Adapter
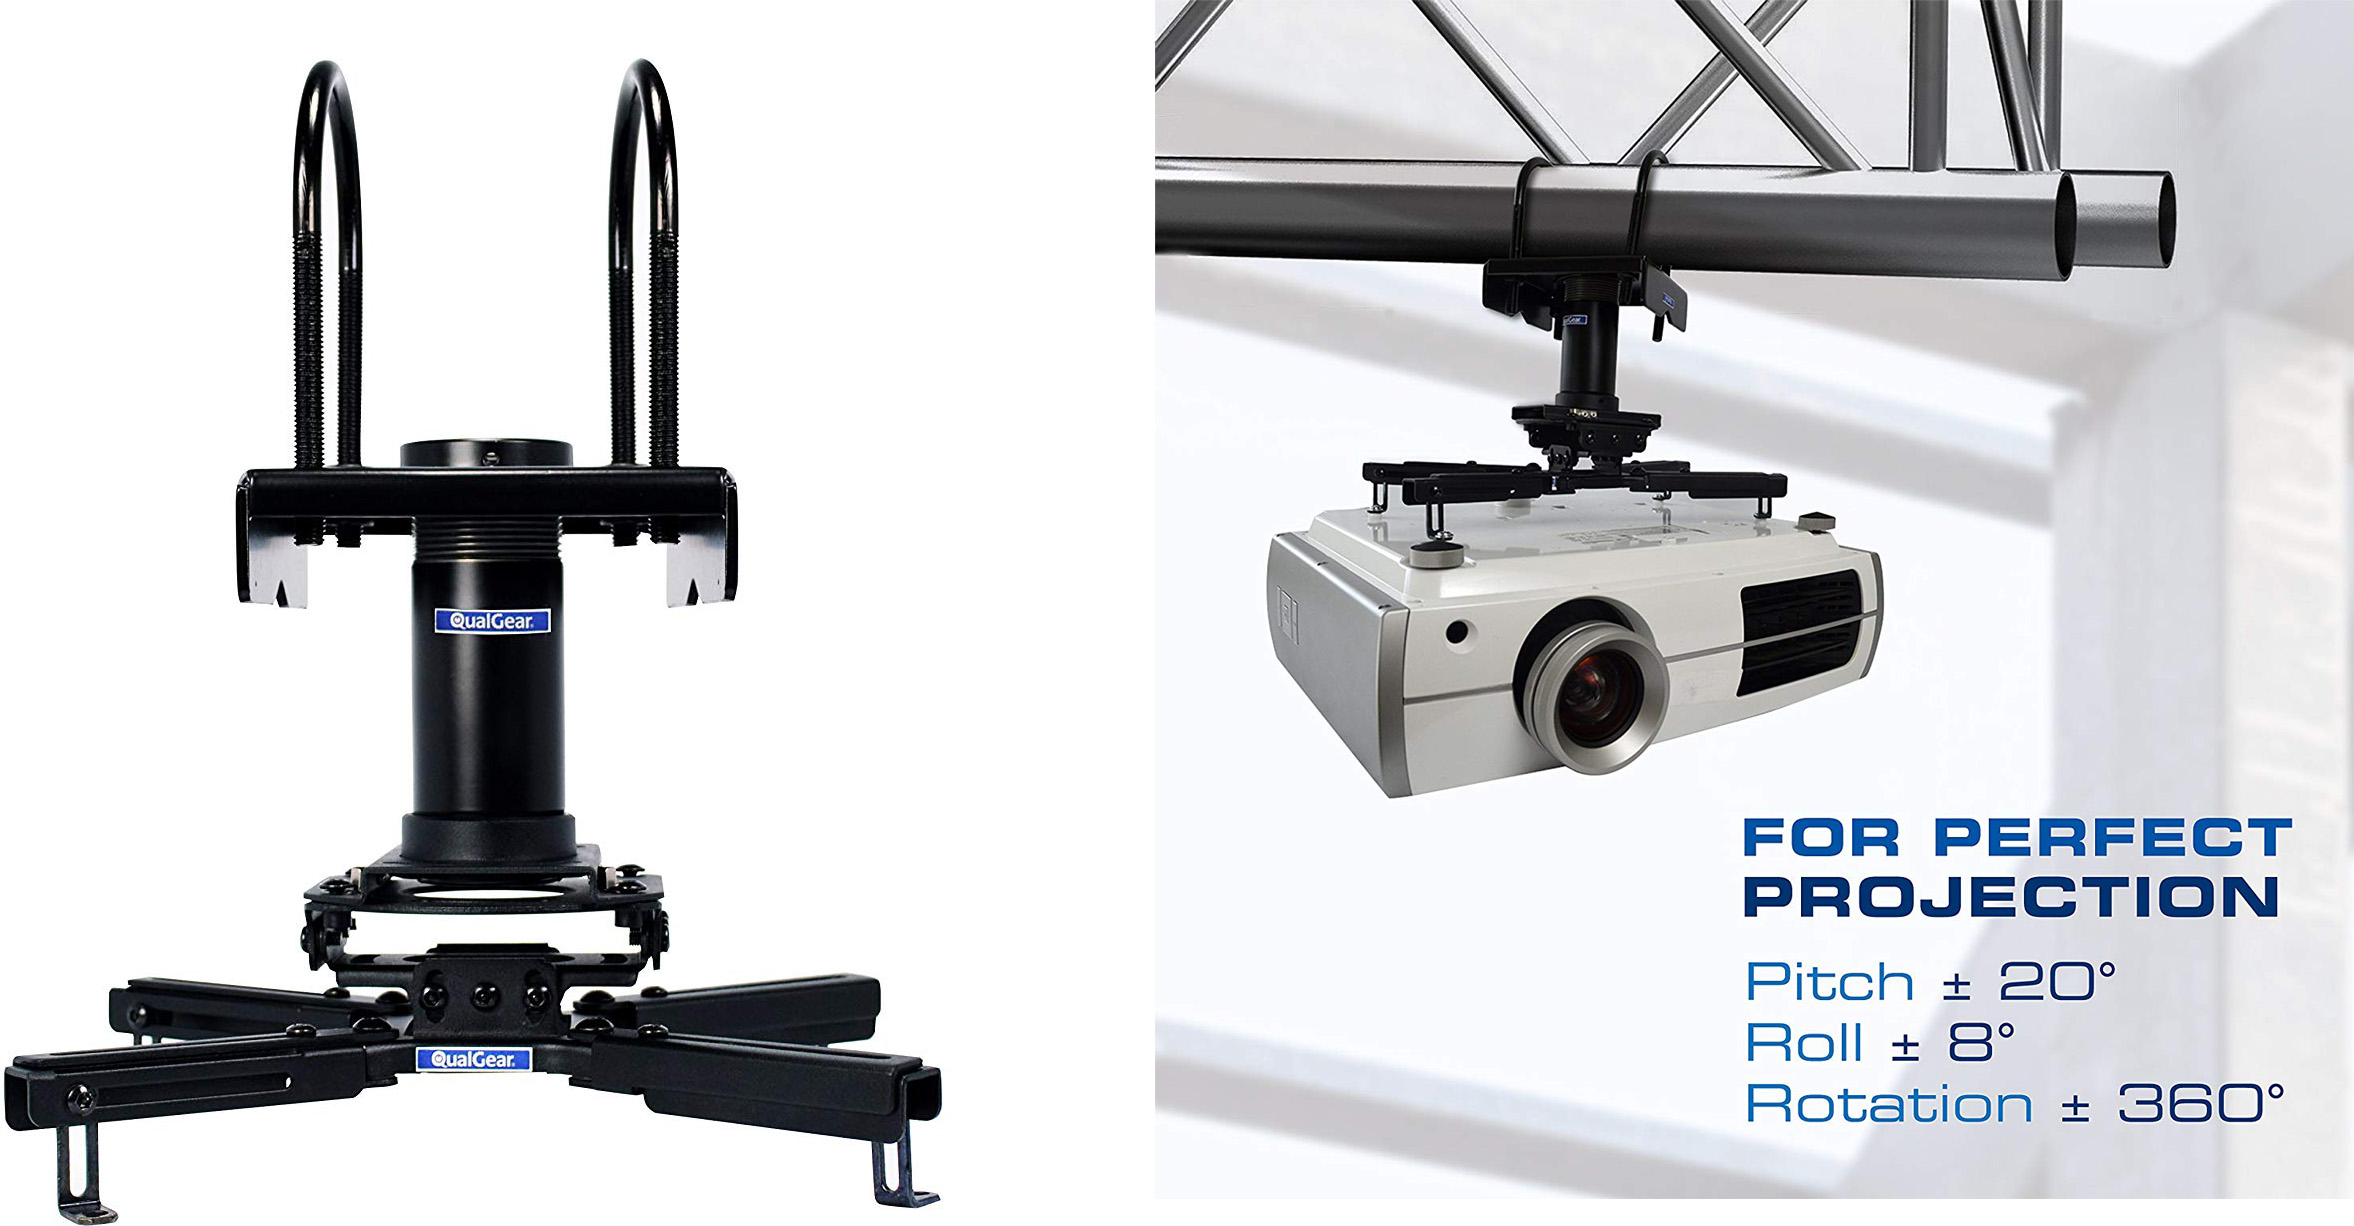
This is one of the best out-of-the-box solutions for mounting a projector. It will probably run you from $80 to $100. This is a projector mount designed to mount to a truss. It has two U-bolts on it that are perfect for mounting under a pipe. It has four adjustable spider-legs that will bolt to the projector. This mount is fairly easy to adjust left-to-right. For up-and-down, you will find yourself loosening the U-bolts and tilting it on the pipe itself. This is not as easy to focus as a lighting instrument, but it is a very good out-of-the-box solution. As with any solution, use a safety cable, too.

Photo by Richard Finakelstein 2019 . We added a little truss to get the ceiling projector a bit lower than the regular pipe. 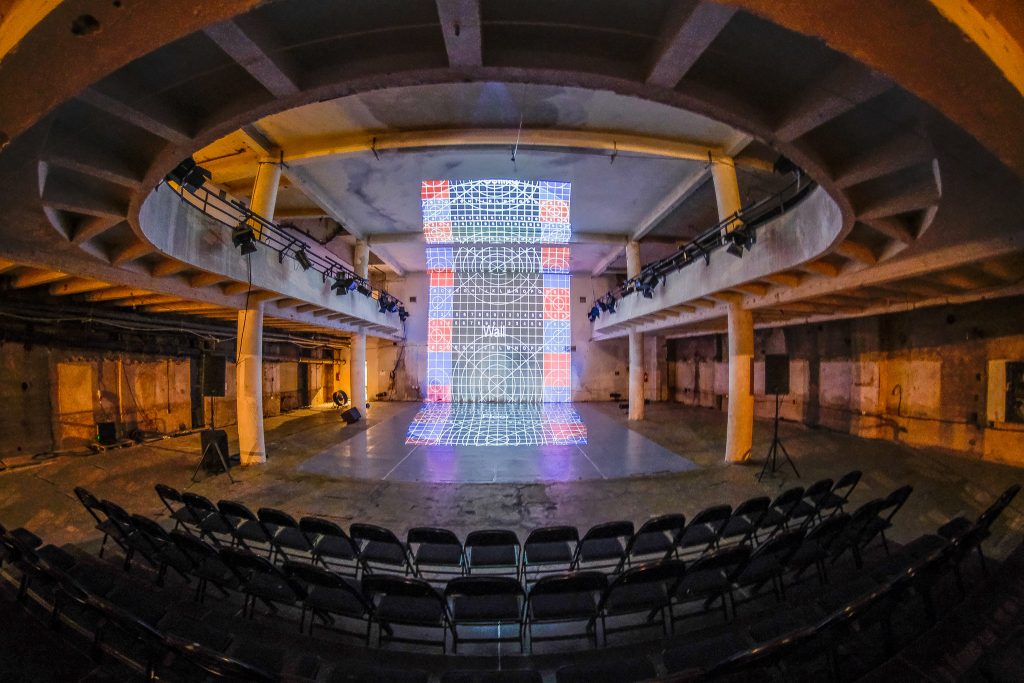
Photo by Richard Finakelstein 2019 . 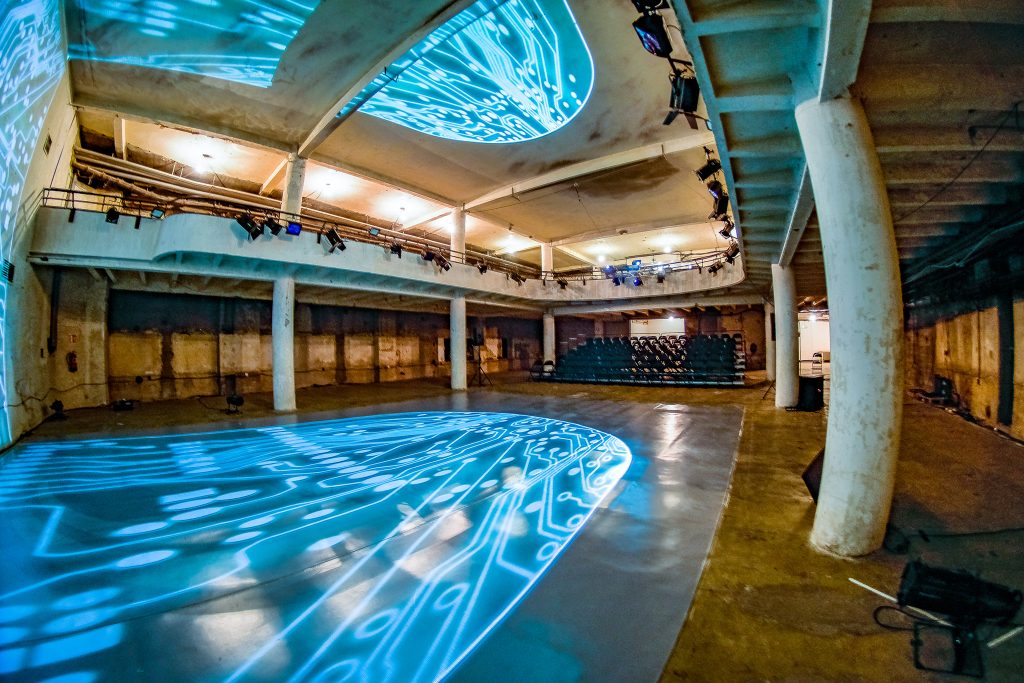
Photo by Richard Finakelstein 2019 . 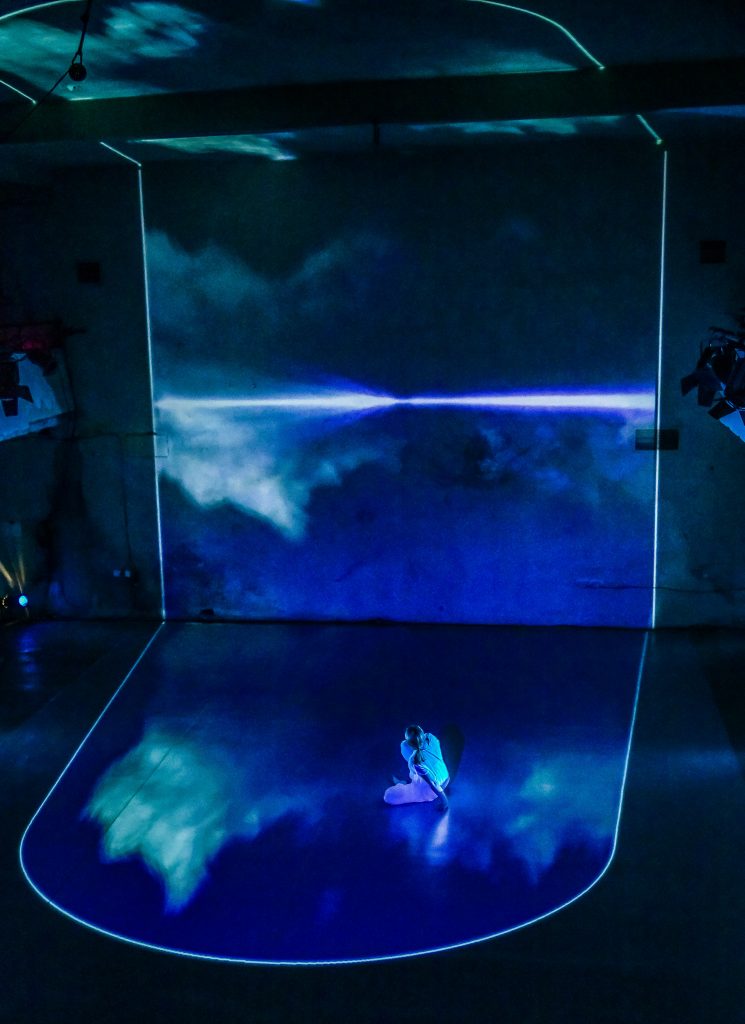
Photo by Richard Finakelstein 2019 .
An installation for Brilliant Being, presented June 13, 2019 in Prague at the X-10 Theatre. We projected on the back wall, on the ceiling, and on the floor of the all-cement space. We used the truss mounts shown to mount our projectors quickly and solidly. You can see more on that show here.
Using a ceiling mount
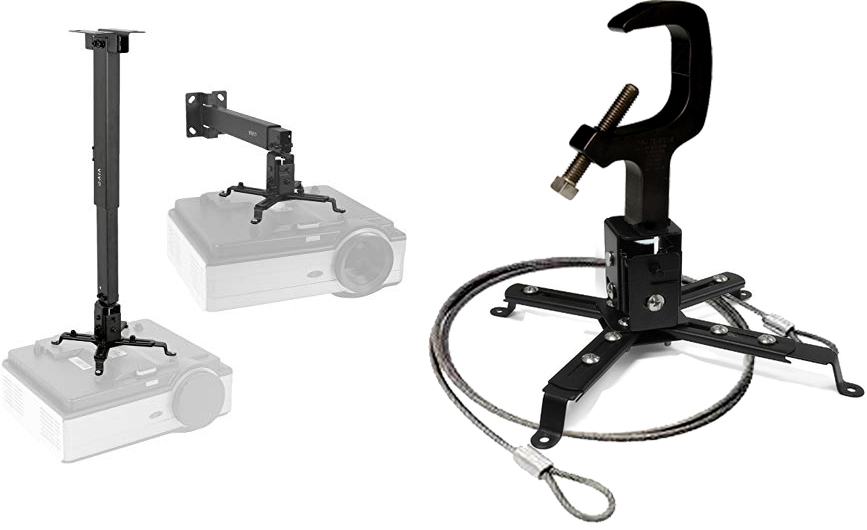
RIGHT: You can replace the mounting hardware with the c-clamp from a lighting instrument. Use a load-rated bolt and washer, plus a safety cable.
This projector mount is intended to be used in a classroom. You can see that it has four little spider-legs. These little arms have adjustable length, and they can pivot this way and that. You have to manipulate them so that they line up with the little mounting bolt-holes on the bottom of your projector. I have modified these types of unit in the past, and have attached a lighting C-clamp to them. Always use a safety cable. An understanding of hardware ratings and the principles of stage rigging is essential if you are going to mount something like this overhead.
How well does this type of mount work?
It works, but it is kind of a chore to pan and tilt. It’s designed to point straight at a screen on a wall. It is intended to be adjusted only the first time it is installed. To adjust the pan and tilt, you need an Allen wrench, and some swear words. I usually end up using the c-clamp to do most of the adjustments. It’s also slow to get on and off of a projector, so when we used this sort of mount, we often left it on the projectors when they were stored.
Where do I attach a safety cable?
Almost every projector has a little metal bar on it where you can attach a safety. Unfortunately, these are sometimes too small to get a rated carabiner or quick-link into. Sometimes I make a loop of aircraft cable and permanently attach it to the projector to make a better place to hook a safety cable. Be sure the connection is a strong, positive connection that is not just attached to the plastic housing.

What kind of screws or bolts?
I usually take the projector and the mount to the hardware store. I stand in the aisle and keep trying bolts until I find the ones with the length and diameter that will work best for what I am doing.
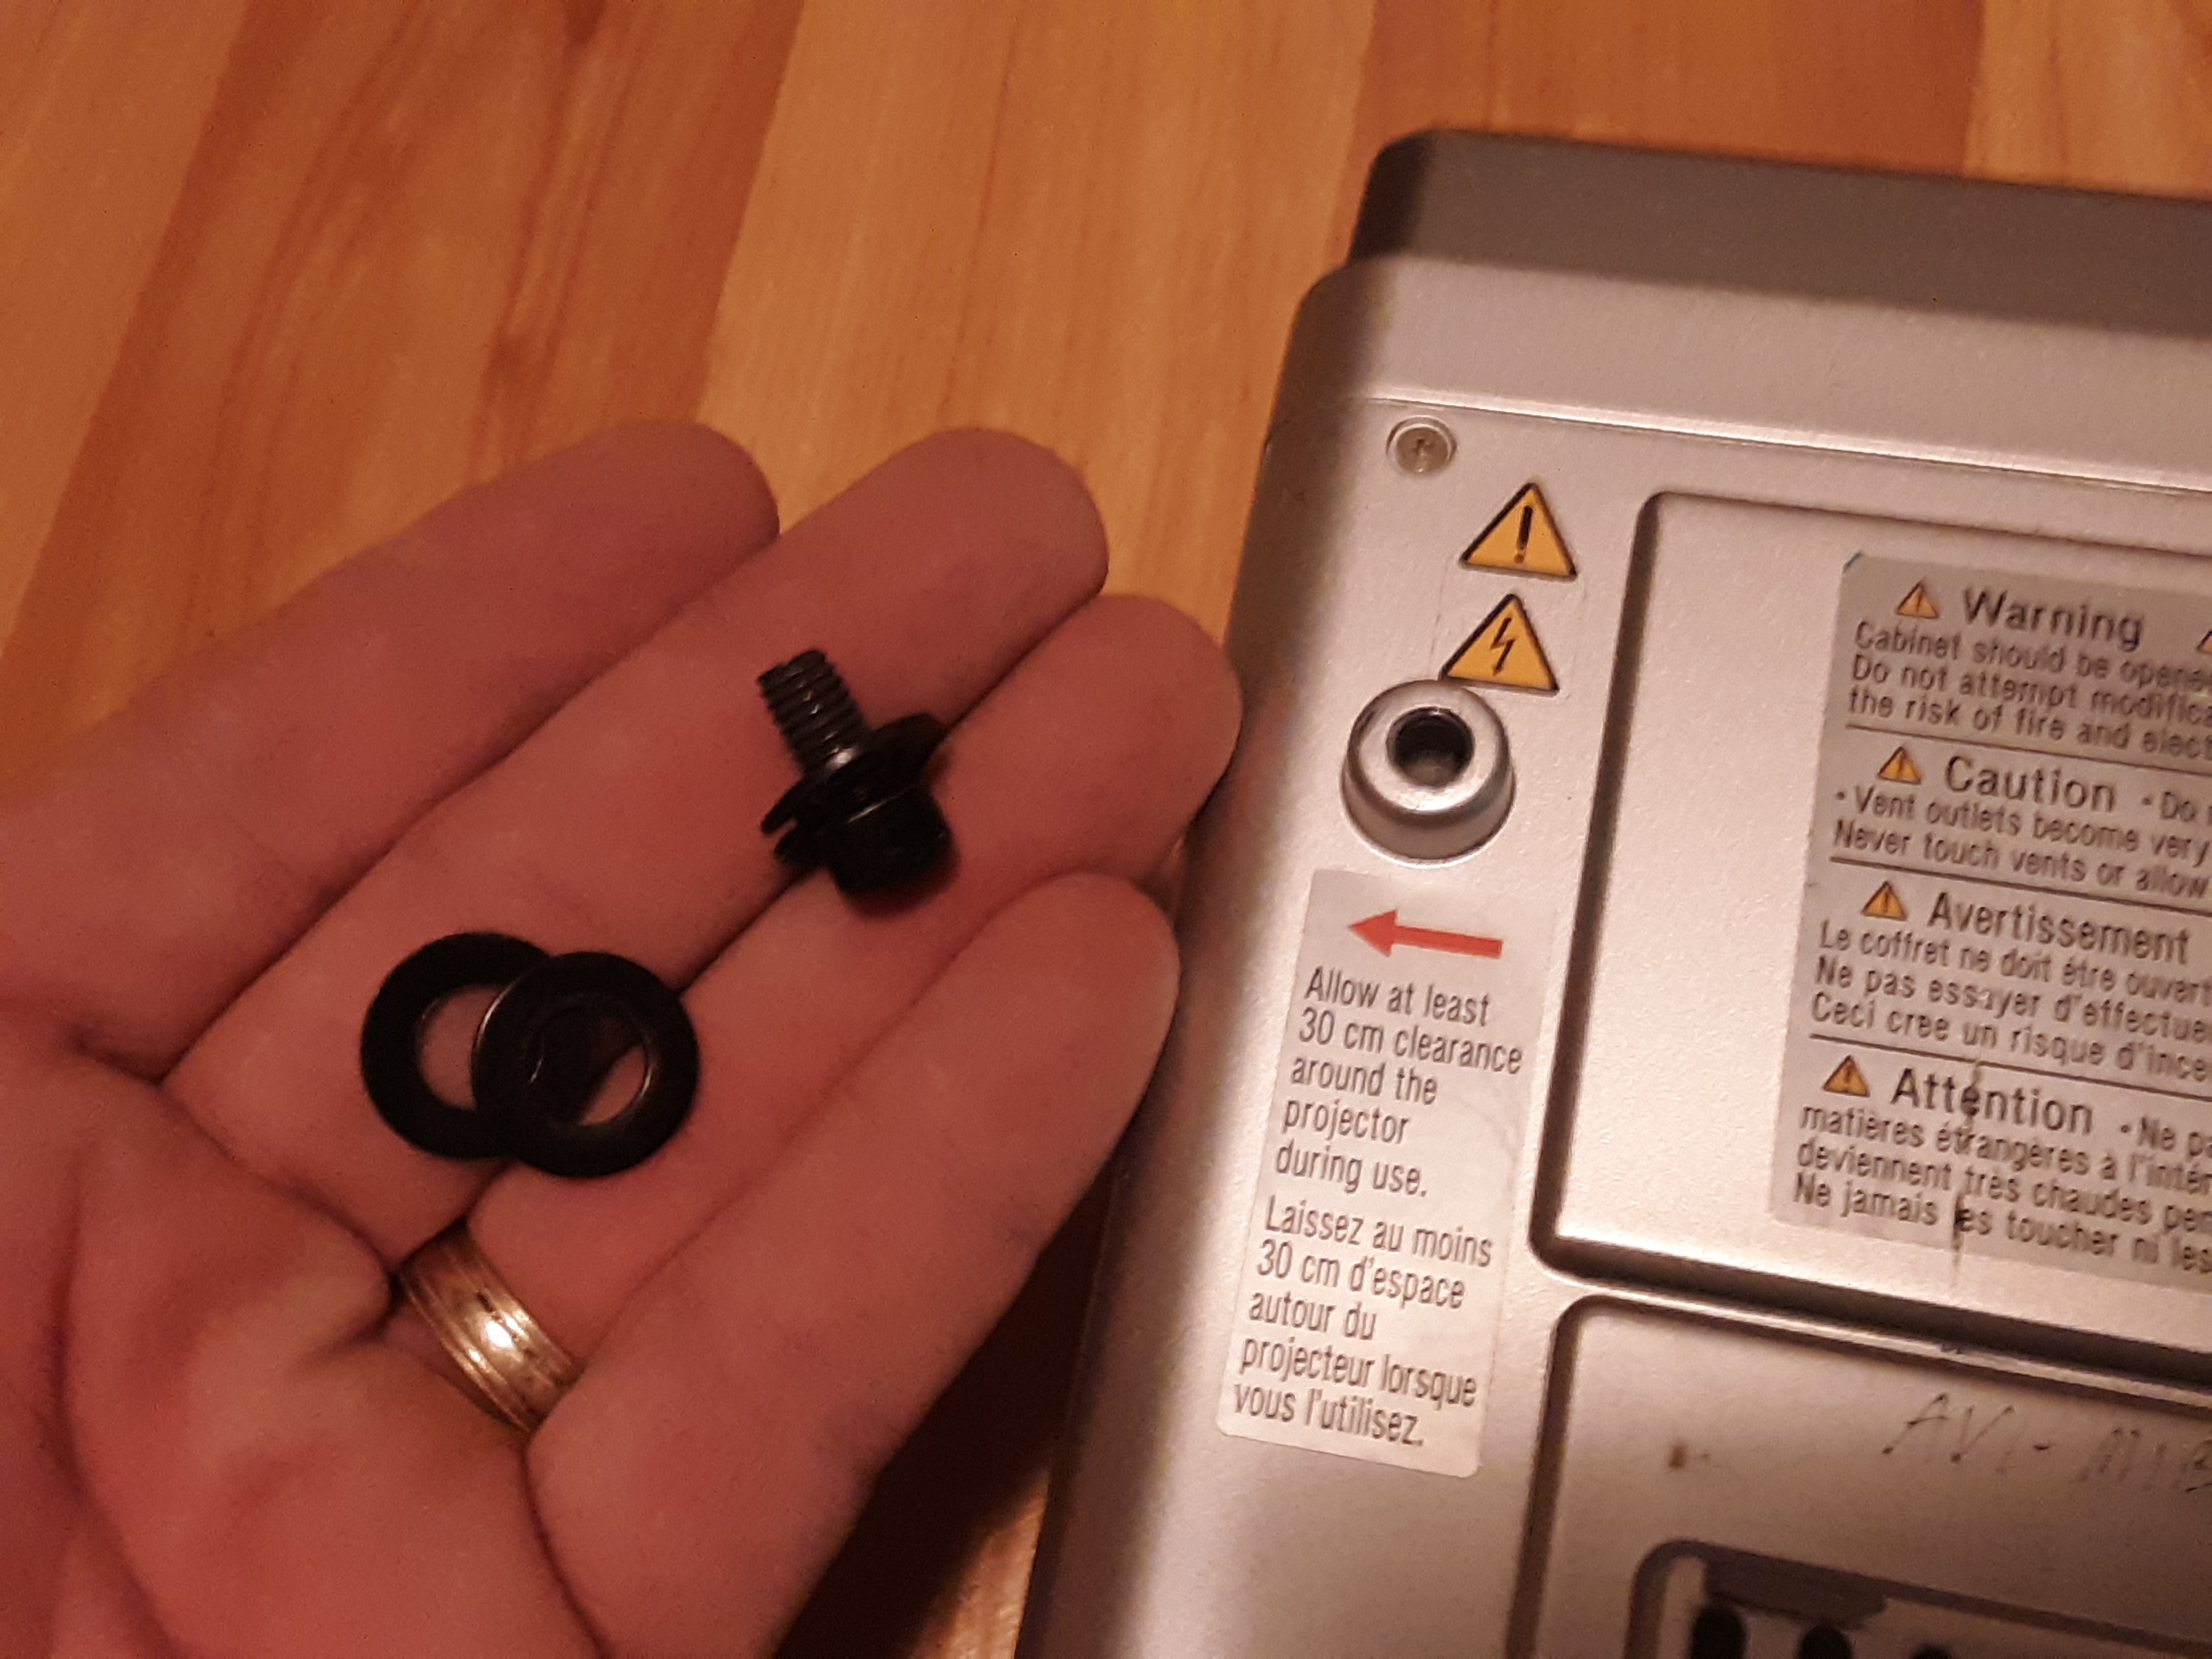
Use rated bolts that are the perfect length to attach mounting hardware. Washers make it safer and more reliable.
What is load-rated hardware?
Load rated hardware has been tested to carry a certain amount of weight. A projector is not heavy – it does not require crazy strong hardware, BUT if you use non-rated hardware, it is not proven to hold up to any weight or load at all. The stress of tightening it down could weaken it to the breaking point. Spend the extra minute to read the description of the bolts, and spend the extra dollar.