This is an improvement on an earlier article.
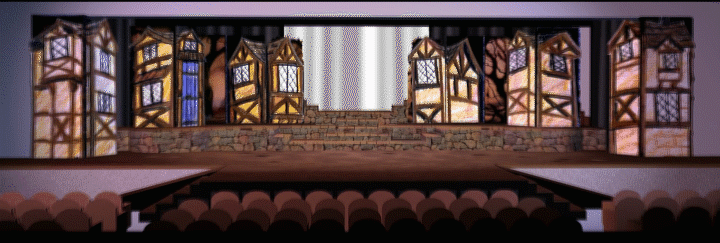
Today I received a question by email regarding a post from 2019. It is titled Changing Scenery with Storybook Panels. It demonstrates how to set up hard flats in a set design like storybook pages to quickly change settings. A set design for Disney’s Beauty and the Beast is used.
Hello Mr Kizer!
I came across your story book flat video and was so impressed! That technology is exactly what I need for a couple of shows we are producing this summer. I was wondering about the placement of the “book spines” in the 3 location Beauty and the Beast design. How do you get the pages to line up correctly without bumping into each other when they turn? Are the flats staggered slightly? I see how the hardware connection works when changing between 2 locations, but can’t quite picture how the extra “page” gets placed for the 3rd location. If you could provide and additional details/clarification I would greatly appreciate it!
Thank you for the great idea!
Very truly yours,
Amanda
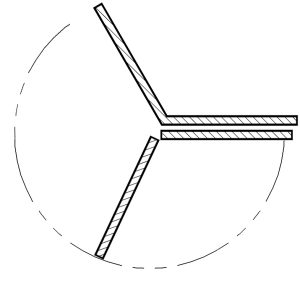
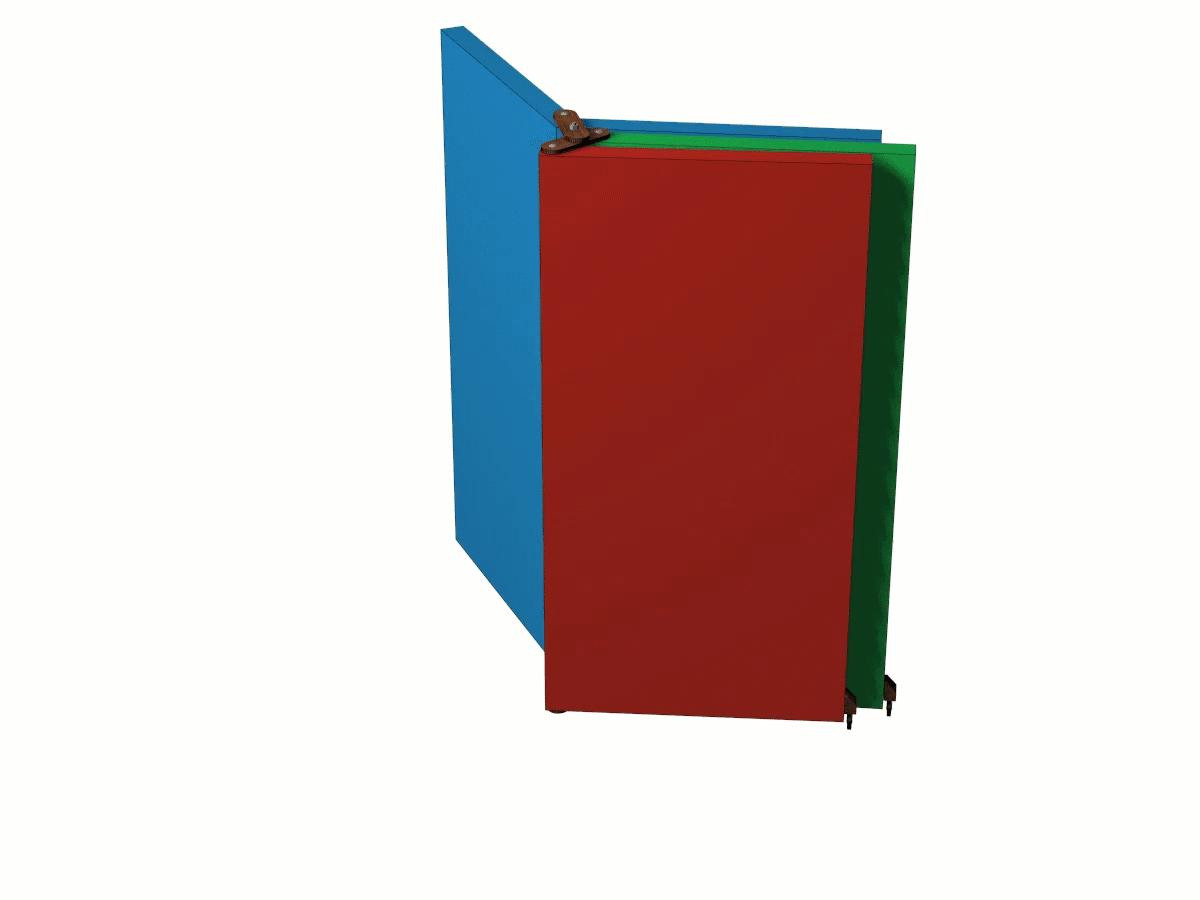
As you can see, the storybook panels are attached to flats with a convex corner. There are two panels on each unit. When we did this for Beauty and the Beast, my lead carpenter spent some time working with the brackets so that one of them shifted a little as the panel turned. It worked really well, but I have no photos of it. The solution above works well for a single page, but if you put two pages up, they collide unless you modify it.
A lot of the people who visit this site are looking for complete solutions. If you can cut four piece of wood and drill some holes, the following technique should do what you need.
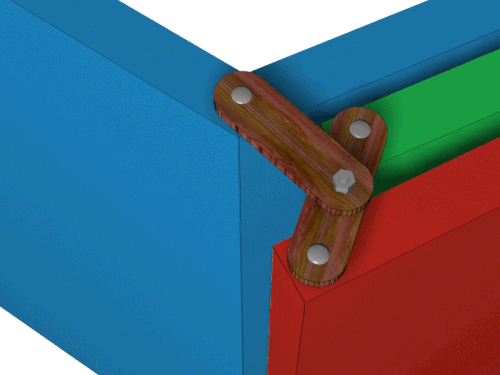
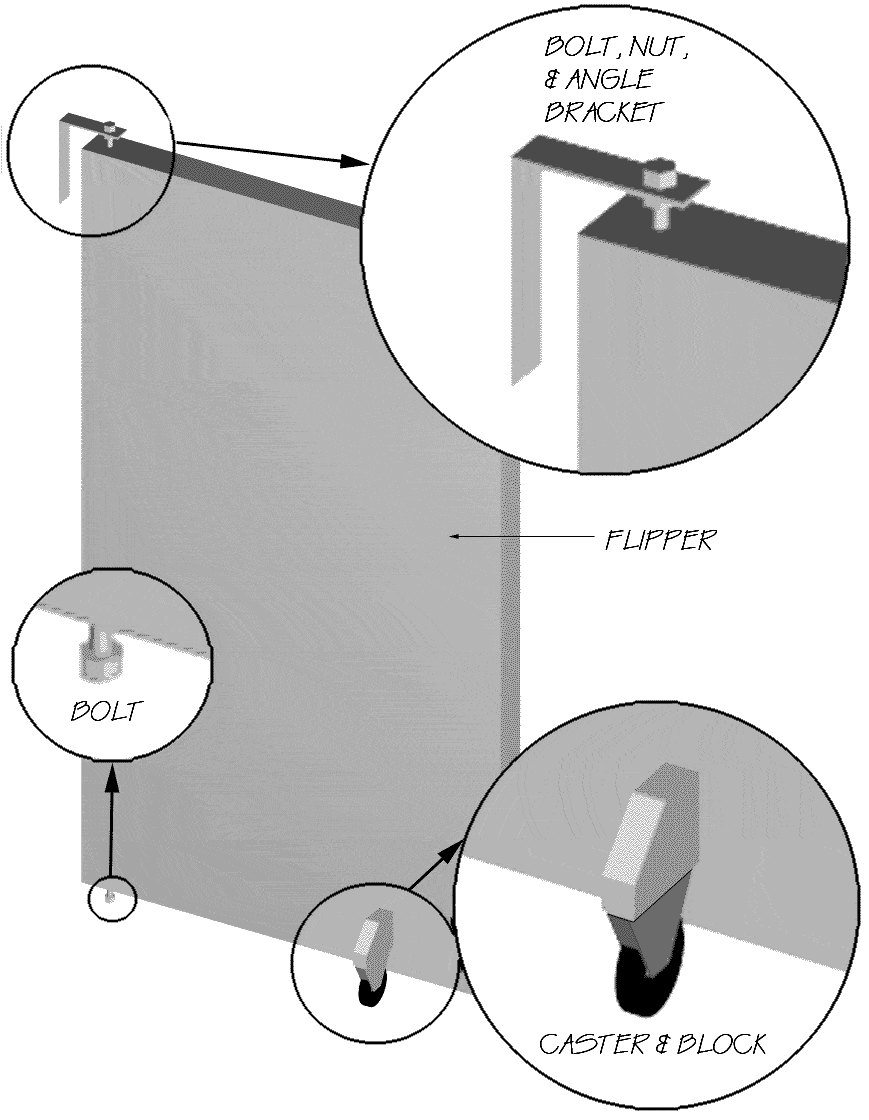
A straight-forward way to get two panels working is to rig them as shown here. You can make four brackets like these from plywood or 1×4. Drill holes in then bolt them to each other and to your flats. Scroll down a little more and you will see a drawing of the brackets.
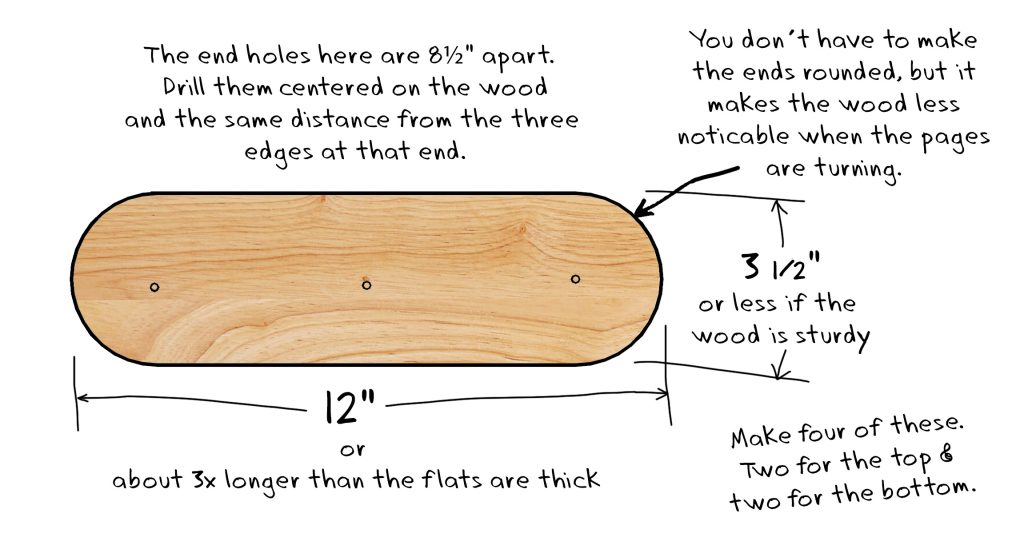
If you are using flats with the frames on face, then your flats are going to be between ¾”and 1¼” thick. Your brackets can be shorter in that case, perhaps only 8″ long. For either type of flat, you could use brackets that are more narrow. They could be metal instead of wood. I am leaving this like this for now because for many, this is likely to be the simplest solution.