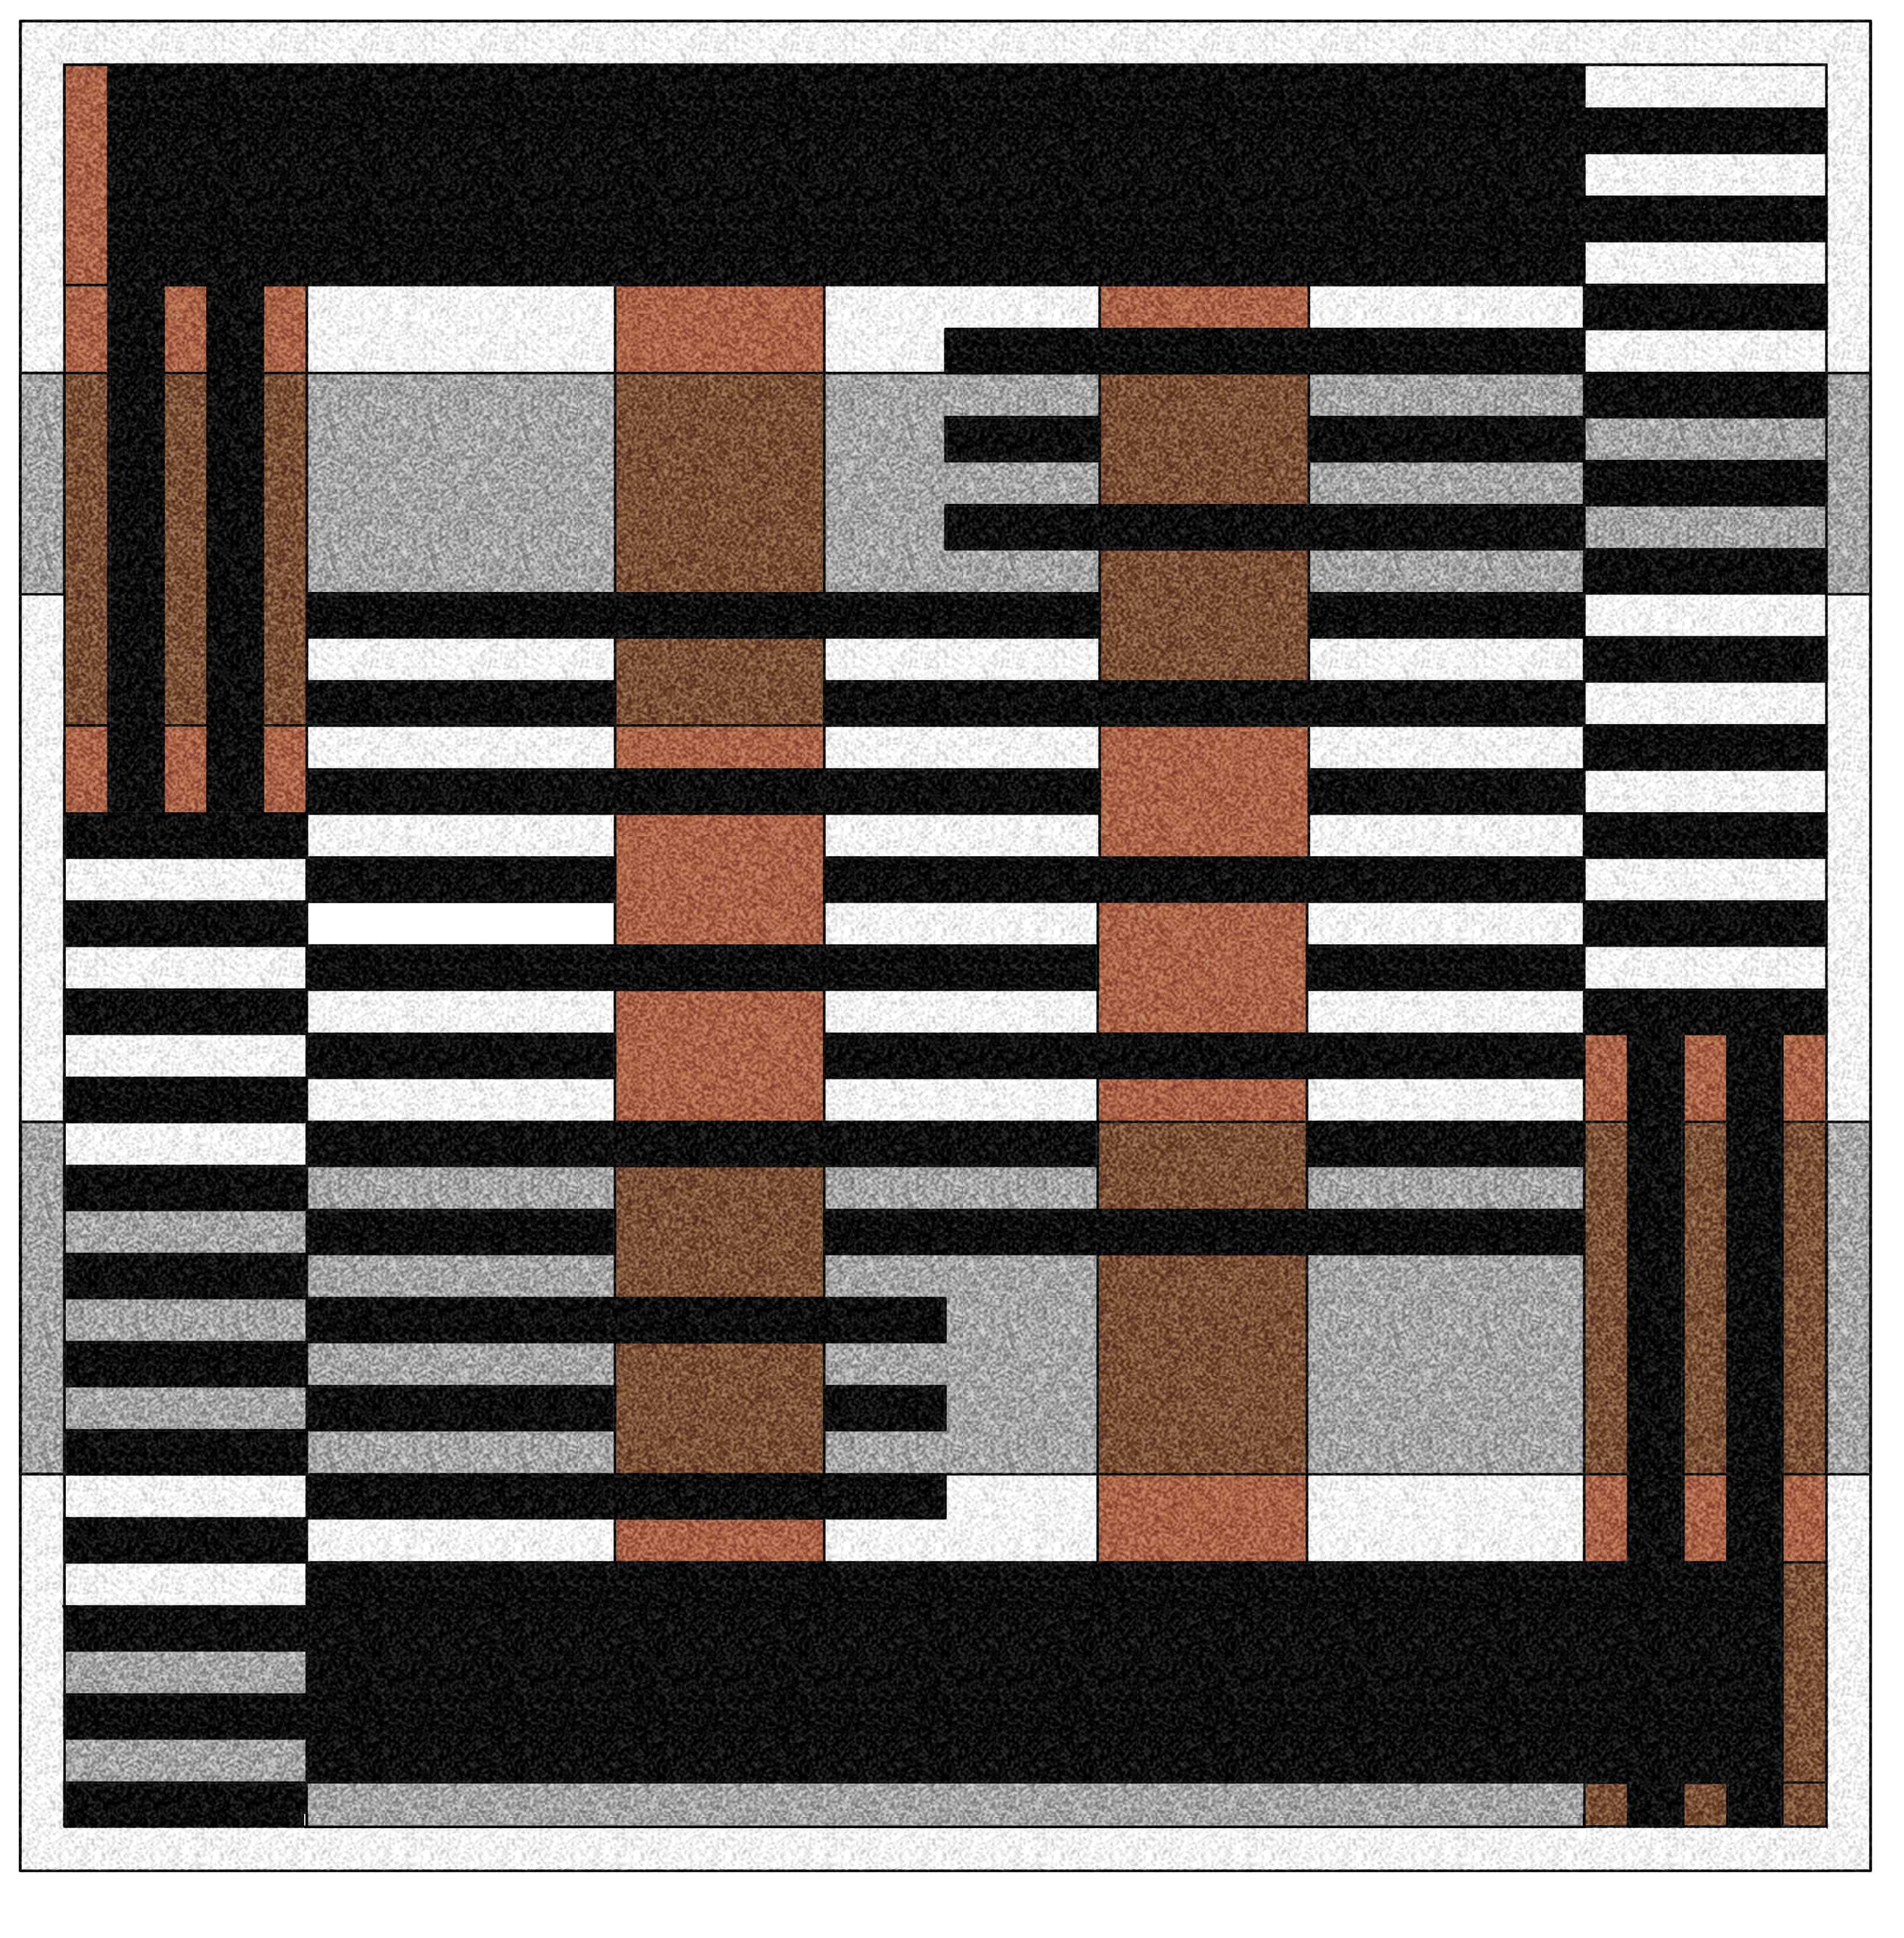
Soo the GOC rug did not break down well into any tidy measurements in AutoCAD. I reworked it a bit so that it is made up of even inches.
Before you start ripping strips of material, let me show you more what I was imagining for process.
Below is a layout of 8 pieces of homosote or whatnot you are using. They are all 4×8 or 2×6 or other similarly easy sizes.

The PSD file linked below has 8 layers, each one with the content for one of those bits of material.
- If I were doing this, I would
- Lean the first rug piece against a wall.
- Point a projector at it with a laptop and Photoshop.
- Use the Photoshop Distort tool to line up the first chunk of rug perfectly with the homosote.
- Paint in the correct colors, saving the fine spatter texture for later.
- Repeat these steps for the other seven pieces of material.
- Assemble the entire rug someplace, touch it up if needed, and do a fine spatter on it all.
If you feel that you would tackle this better using carpentry, rather than painting, you can use the AutoCAD file below instead. I made the pieces mostly 4″ wide, to minimize fence adjustment. You could cut them all up, paint them, and then assemble them.
Photoshop File: God of Carnage Rug Assembly