I am at a point in the semester where ordinarily, I spend two or three classes in one of our theatre spaces experimenting with lights. One of the goals is to bring beginning theatre students to an understanding of how a lighting design is often composed of washes and specials, and what those terms mean. I also try to create an understanding of the light plot, the hang, and the focus as merely being the preface to the actual art of the lighting design, which happens when we create and run cues with the rest of the company.
Since there is no way to bring my students together in a theatre space right now, I have turned to some of my virtual tools. I have a virtual theatre complex that I built many years ago. I use the spaces within it to demonstrate concepts in various tools and videos.
Today I made a ten-minute video that, hopefully, makes up for a lot of the demonstration that I usually am able to do. I made this for my Intro to Theatre Design class, which is composed of undergraduate B.A. students emphasize all aspects of theatre, not just design and technology.
It should be very suitable for high school students as well as university.
Full Transcript:
Hi. I’m Matt Kizer.
Today I’m going to talk through the process of
putting together a lighting design.
Lighting design is about making choices.
It is about arranging equipment in the
performance space …
… so that you are best prepared to create art
that supports a performance.
Let’s start with one actor. We’ll point just one
light at her.
There are a few things we can choose even
with just one white front-light.
The light can hit her face from a low angle, or
from a high angle.
Low angle lighting illuminates faces really well.
It also overshoots upstage of the performers
into the space behind them.
Steep angle lighting creates heavier shadows
on faces and bodies. It creates tighter areas
of lighting on the floor, too.
No matter whether it is steep or low angle, it
can also come from the front, or from a side
angle.
Light from the front is effective and thorough.
It can flatten out features a little.
Light that is from off-center creates shadows
on one side. This is good for sculpting but
can create some visibility issues.
This source direction favors audience on the
actor’s right, and might cause problems for
people seated more stage-left.
Depending on where we can hang it, we might
need to choose one type of instrument over
another.
Let’s figure out how to create exactly the look
shown here.
There are lots of different types of lighting
instruments.
This instrument could create the desired look,
but we can’t hang it in empty space.
This instrument has a more narrow field.
Maybe it will help.
Let’s move it upwards.
It looks like the cone of light that it creates is
TOO narrow for our needs.
This one, however, will do just what we want
when we hang it on our grid.
Different lighting instruments have different
lenses, and they shoot light out in differently
shaped cones.
Now let’s consider how this cue looks from a
seat over to the side of the playing space.
If you are sitting over to one side, you can see
her, but she is kind of shadowy.
This isn’t necessarily bad; the shadows flatter
the shape of her face and form. But if she
turns this way, her face will be dark.
Let’s add a second light to this, and spread
the two lights apart.
This reduces the shadows, but it also reduces
the sculpting. The light is no longer as
dramatic.
A strong choice to make at this point is to
keep light coming from multiple directions,
but use it to simulate light and shadow by
using different colors.
In this scene, we’re using pink and blue.
The pink is coming from stage-left, and it
creates the illusion of a light source.
The blue is coming from stage-right, and it
creates the illusion of shadow without actually
leaving half of her face dark.
We establish a warm color to emulate the
light source. We fill in from the other side
using a cool color to emulate shadows.
A steep-angled backlight usually completes
the composition when we do this
arrangement.
This method is rooted in a system conceived
by a designer named Stanley McCandless,
(May 9, 1897 – August 4, 1967).
McCandless is considered the father of
modern lighting design.
Though there are many lighting methods used
today, his is considered the foundation of the
craft.
It is worth noting that the use of color to create
highlight and shadow was also employed by
impressionist painters like Claude Monet.
It is worth noting that the use of color to create
highlight and shadow was also employed by
impressionist painters like Claude Monet.
With our current setup, we can only generate
one look unless we want to plunge part of the
actor’s face into darkness.
If we light only one side or the other, we ignore
audience to the left or the right of the actor.
We can add versatility to this arrangement by
adding more colors. We could have a second
set of lights from the front with different colors.
We can also add lights from other directions.
With more lights to choose from, we can
make different looks for different moments,
settings, and time of day.
By mixing colors coming from a single
direction, we can create more colors, like
ambers and magentas.
By surrounding the actors with light, we
ensure that all of our audience can follow the
story telling no matter where they are sitting.
So far so good. However, this little
arrangement of lights that we have so far will
not let us light an entire stage.
The lights that we use generally are good for
filling an area from six feet up to about twelve
feet wide.
When they are shooting too far, the field
becomes too wide. It becomes dimmer and
less useful.
We perform a little magic trick at this point in
the process.
We allow ourselves to take this entire system
of lights, and duplicate it into other areas.
We break up the stage into circles.
We mark the center of each, and we copy our
lighting plan consistently to surround each area.
If we bring up groups of lights with the same
color at once, it looks like a single source
coming from one direction.
We usually arrange these to conform to a
specific set or performance space.
By covering the entire space with areas, we
can treat the entire stage like one big,
consistent performance area.
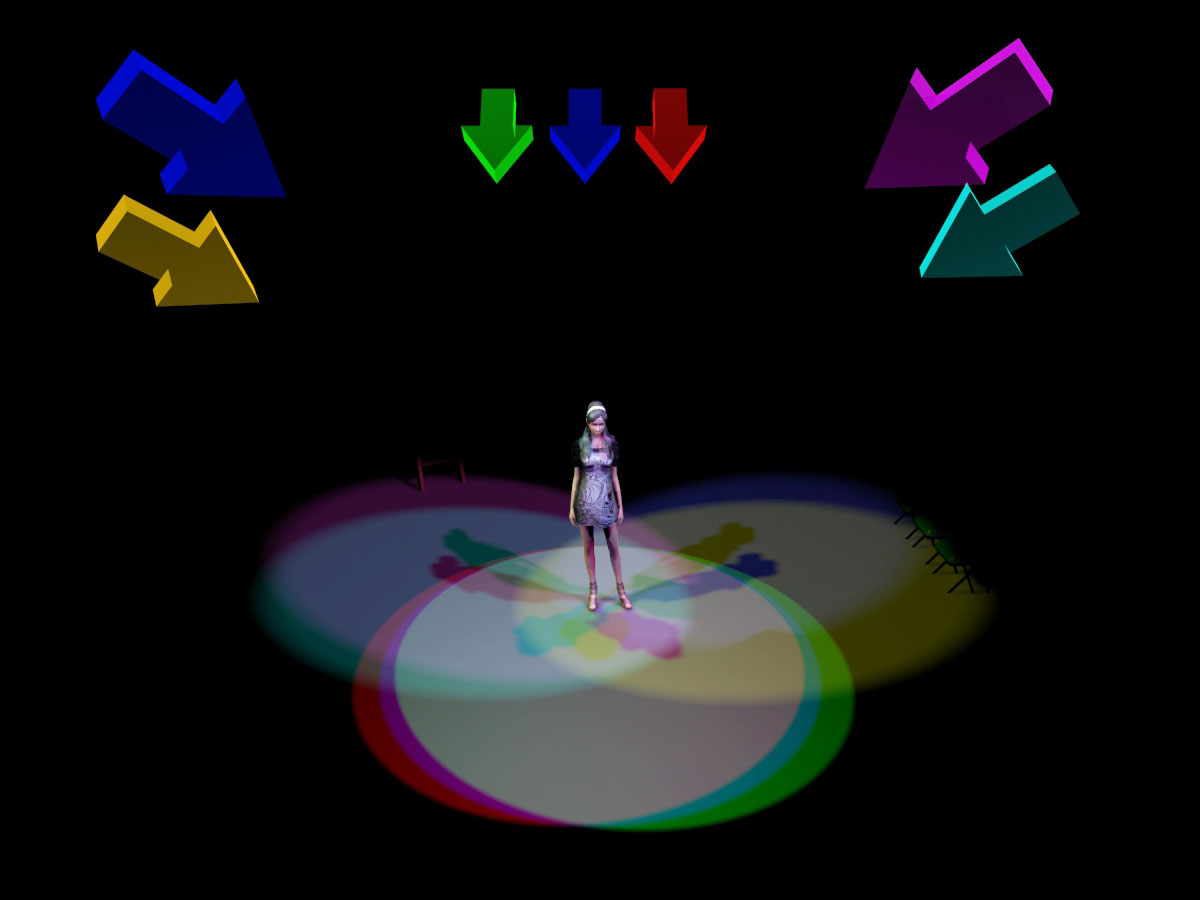
Here you see all of the toplight for every area.
By mixing the colors that we have available,
we can create combinations of warm and
cool.
The really important thing is to arrange the
lights consistently so that the same colors hit
each area from the same direction.
In this design, no matter where you go on
stage, the cyan is coming from down-stage-
left.
If this actor goes anywhere on stage with
these specific lights up, her shadow will
always point in the same direction.
Here is the same effect using the red top
lights instead. Notice the consistency of the
shadows.
A group of lights that can work together from
one direction like this is called a “wash.”
Washes are combined to make new colors
and new looks. They’re a building block for
cues.
Units within a wash can be brought up in
smaller groups or individually. They do not
have to all come up at once.
We’re going to keep this simple for this
demo, though.
Not every instrument in a design is a part of a
wash.
Here’s a little spotlight on those shutters up-
center.
This window gobo at center-stage is the only
one of these in this entire design.
Here’s a little spotlight on those shutters up-
center.
And here is some light for the stairs up-right
through that archway.
These are important lights that are separate
from the regular washes. These lights are
called “specials.”
All of these design choices are planned out.
The beginning of the design might look
something like this.
We’re going to need something with a lot
more information and accuracy, though.
Most of our lights are going to be hung on
pipes above the stage.
Some theatres have battens called electrics.
Others have a grid.
We need to create a light plot that shows every
light that needs to be hung.
The light plot is a drawing that emphasizes all
of the places in a theatre venue where lighting
instruments can be hung.
The acting areas are important, though they
are not always shown on the final plot.
We locate the instruments for one area the
same as we did earlier in our planning.
It is important to consider the distance and the
angle to the actor’s face for each instrument
placed.
The angle of incident to the actor’s face is a
part of the design.
Also. the throw-distance will strongly influence
the type of light that is used.
Determine reasonable positions to place
lighting instruments. Assign them to the pipe
nearest their ideal position.
Do this for the first area. Then imitate these
positions for all of the other areas.
What you end up with is a drawing that shows
all of your lighting instruments with notes.
The notes might tell us what color is in the
instrument, where it is focused, and how it is
hung.
A lighting design might include a lot of instruments.
Keeping track of these on the light board can be
complicated.
In a lighting design, instruments are assigned
special numbers called “channels.”
Channels are patched into the lighting
console. They are what the computer uses
to control the instruments.
A good design has a system of channels that
is easy to remember.
Writing cues should be casual and fun. It
should not require the designer to constantly
look up numbers.
The end goal for all of this process is really
simple.
There will come a time when the lighting
designer is creating visual art to support the
show.
A good design will provide lots of great options
for any cue.
By having lots of good choices available, it’s
easy to work with directors, choreogaphers,
producers, and other designers.
Like any other kind of art, it is alway done best
when it is done from a mindset of rest and
fun.
Having a great light plot hung and focused in
the venue is the best start. Having relaxed,
easy control of it is the next step.
After that, it’s all collaboration and art.
That’s all I am going to include in this video
today. I hope that this has been useful.
This video was originally made for my Intro to
Theatre Design Class at Plymouth State
University during the coronavirus quarantine.
It is being shared with the community of
technical theatre educators.
If you are a high school student considering theatre,
please check us out!
Music: Perspectives Kevin MacLeod
(incompetech.com)
Music licensed under Creative Commons:
By Attribution 3.0 License
http://creativecommons.org/licenses/by/3.0/
This video was made for Matt Kizer Design
LLC. Copyright 2020. All rights reserved.